Rotary Axis Setup
Rayforge supports rotary attachments for engraving and cutting cylindrical objects like tumblers, glasses, pens, and round stock. When a rotary module is connected, Rayforge wraps the job around the cylinder and shows a 3D preview of the result.
When You Need Rotary Mode
Use rotary mode whenever your workpiece is cylindrical. Common examples include:
- Engraving logos or text on drinkware
- Cutting patterns on tubes or pipes
- Marking cylindrical objects like pens or tool handles
Without rotary mode, the Y axis moves the laser head front-to-back on a flat bed. With rotary mode enabled, the Y axis instead controls rotation of the cylinder, so the design wraps around the surface.
Setting Up a Rotary Module
Before starting, physically attach your rotary module to the machine according to the manufacturer's instructions. Typically this means plugging it into the Y-axis stepper driver port in place of the normal Y-axis motor.
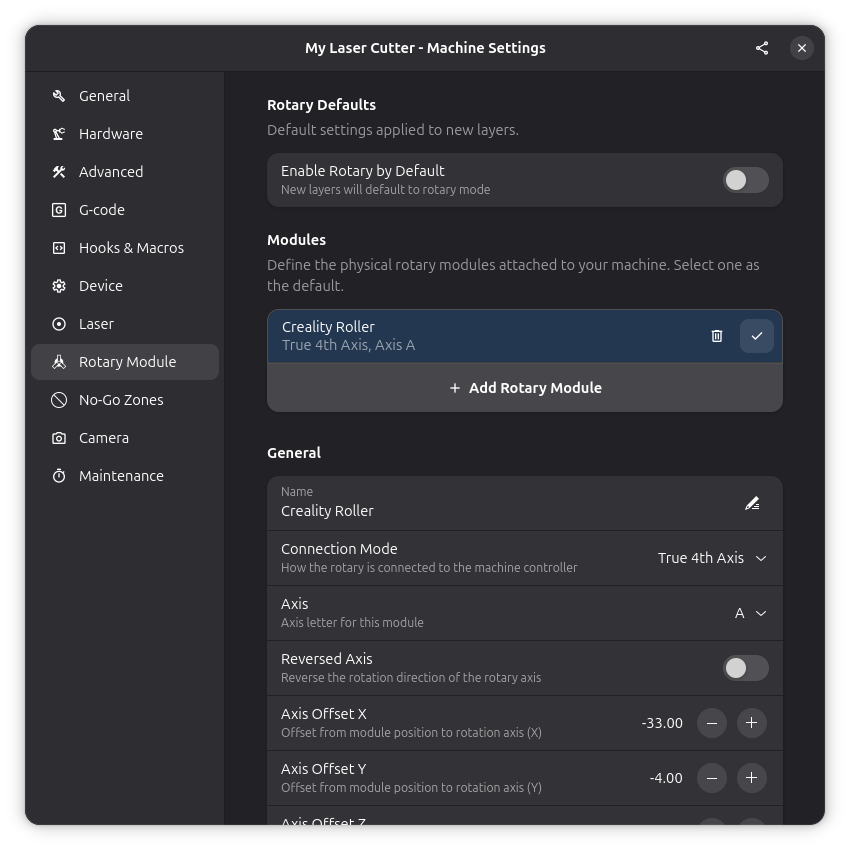
In Rayforge, open Settings → Machine and navigate to the Rotary page to configure your module:
- Circumference: Measure the distance around the object you want to engrave. You can wrap a piece of paper or string around the cylinder and measure its length. This tells Rayforge how big the cylindrical surface is so the design scales correctly.
- Microsteps per rotation: This is the number of steps the rotary motor needs for one full rotation. Check your rotary module's documentation for this value.
Rotary Modes
Rayforge supports two rotary modes:
- True 4th axis: The rotary operates as an independent fourth axis alongside X, Y, and Z. This is the preferred mode when your controller supports it.
- Axis replacement: The rotary takes over the Y or Z axis. This is the traditional mode used by most hobby controllers where the rotary plugs into an existing stepper driver port.
You can select the mode in the Rotary settings page.
Roller-Type Rotary Attachments
Roller-type rotary attachments (where the object rests on rollers rather than being chucked) have their own settings page. If your rotary uses rollers instead of a chuck, select the roller type in the rotary configuration and enter the roller parameters.
Per-Layer Rotary Mode
If your document has multiple layers, you can enable or disable rotary mode independently for each layer. This is useful when you want to combine flat and cylindrical work in a single project, or when you have different rotary settings for different parts of the job.
When rotary mode is active on a layer, a small rotary icon appears next to that layer in the layer list so you can tell at a glance which layers will run in rotary mode.
3D Preview in Rotary Mode
When rotary mode is active, the 3D view shows your toolpath wrapped around a cylinder instead of on a flat surface. The 2D canvas also adapts to rotary mode automatically, and the 3D canvas renders rotary toolpaths accurately in every configuration — including during simulation playback.
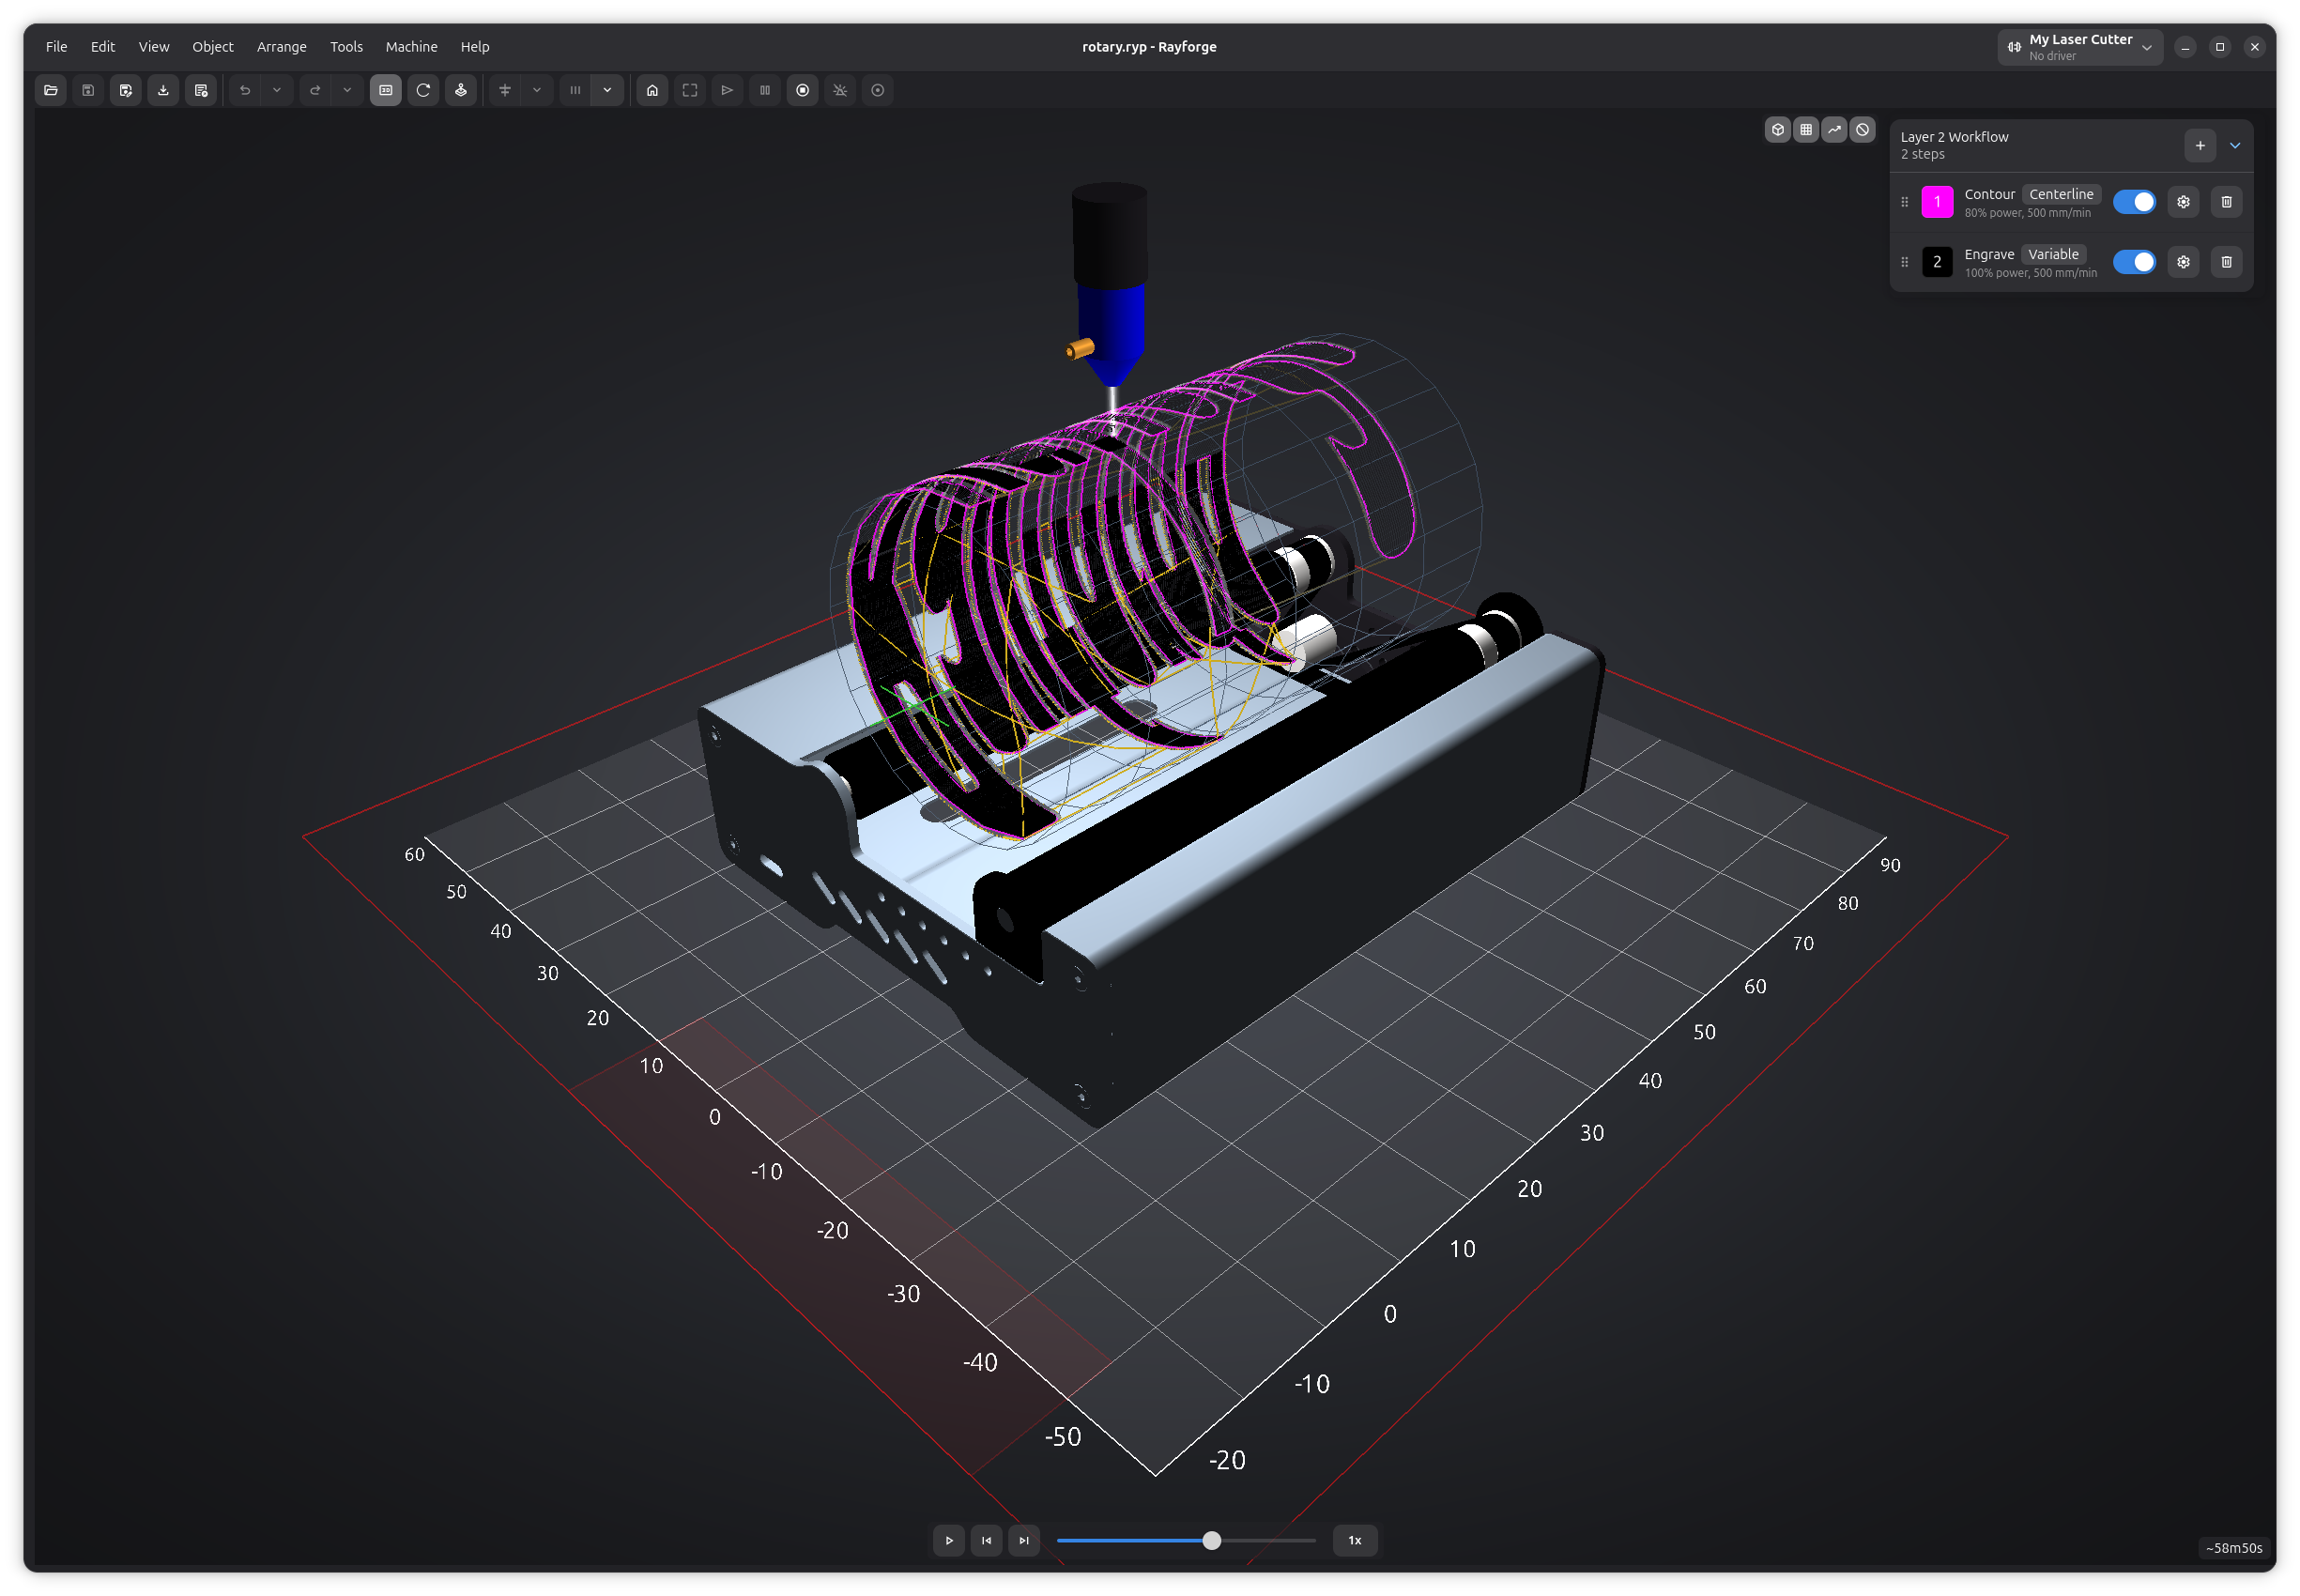
This gives you a realistic preview of how the design will look on the actual object, making it easier to spot sizing or placement issues before you start cutting.
Rotary Module 3D Model
Each rotary module can have an assigned 3D model. The model appears in the 3D view alongside your toolpath, giving you a better sense of how the physical setup looks. You can adjust the model's scale, position, and rotation to match your actual hardware.
Z Step Down
Rotary mode supports Z step down, allowing you to cut progressively deeper on cylindrical workpieces across multiple passes.
Tips for Good Results
- Measure circumference carefully — even a small error here will stretch or compress your design around the cylinder.
- Secure the workpiece — make sure the object sits firmly on the rollers and doesn't wobble or slip during the job.
- Test with low power first — run a light engraving pass to verify alignment before committing to a full-power cut.
- Keep the surface clean — dust or residue on the cylinder can affect engraving quality.
Related Pages
- Multi-Layer Workflow - Per-layer settings including rotary
- 3D View - Preview toolpaths in 3D
- Machine Settings - General machine configuration