First Time Setup
After installing Rayforge, you'll need to configure your laser cutter or engraver. This guide will walk you through creating your first machine and establishing a connection.
Step 1: Launch Rayforge
Start Rayforge from your application menu or by running rayforge in a terminal. You should see the main interface with an empty canvas.
Step 2: Create a Machine
Navigate to Settings → Machines or press ctrl+comma to open the settings dialog, then select the Machines page.
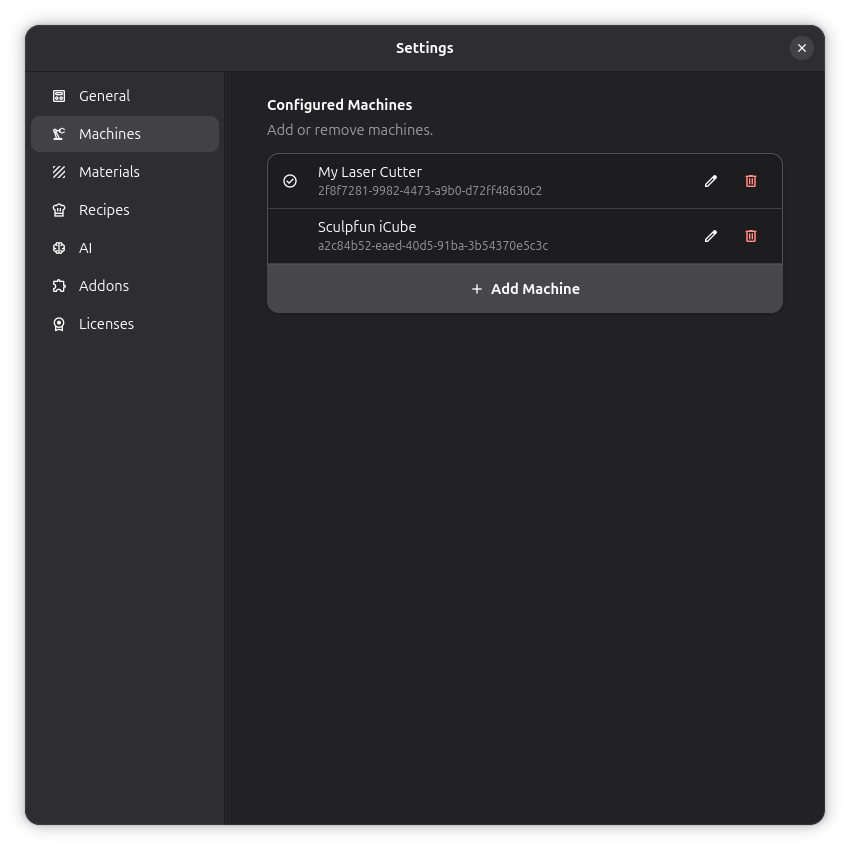
Click Add Machine to create a new machine. Select a device profile from the list to use as a template — each profile pre-configures the machine settings and G-code dialect.
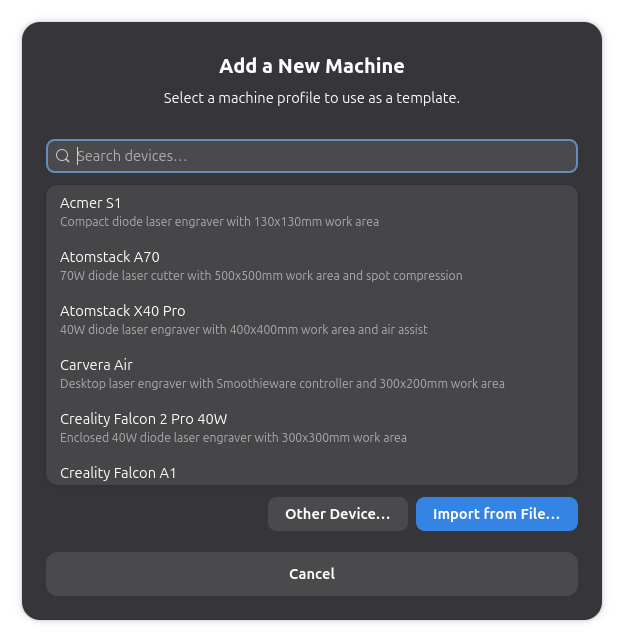
If your device is connected and powered on, you can click Other Device… to use the Configuration Wizard, which automatically detects and configures your machine.
If you have a LightBurn device profile (.lbdev) with camera calibration and device settings, you can click Import from File… and select the .lbdev file. The camera calibration and laser settings from your LightBurn setup will be applied to the new machine.
After selecting, the Machine Settings dialog opens for your new machine.
Step 3: Configure General Settings
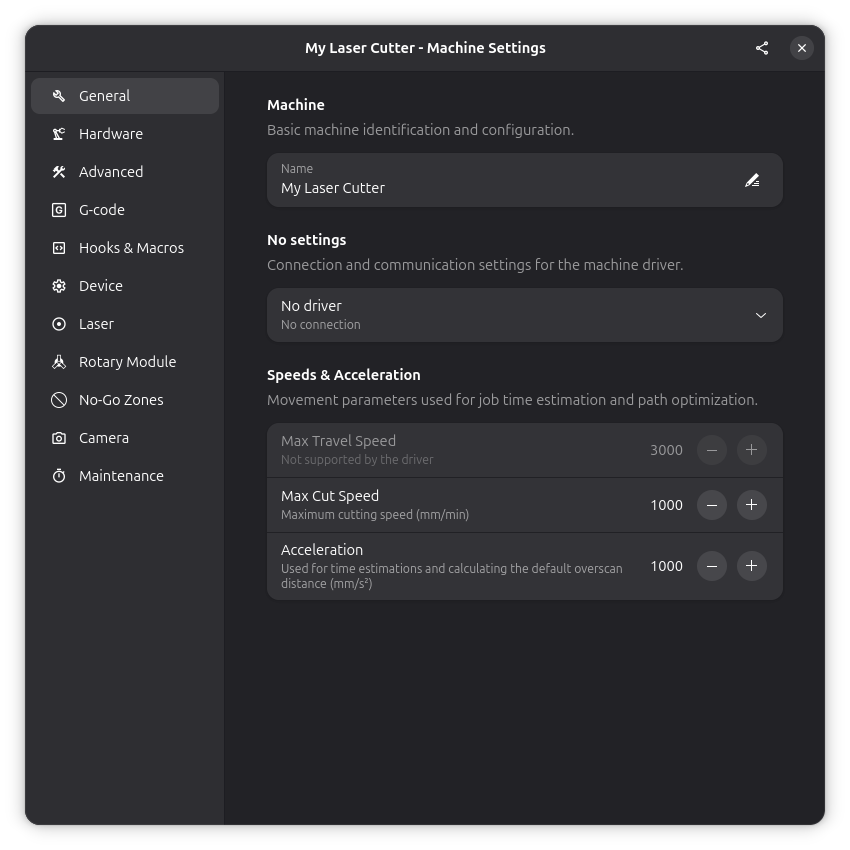
The General page contains basic machine information, driver selection, and connection settings.
Machine Information
- Machine Name: Give your machine a descriptive name (e.g., "K40 Laser", "Ortur LM2")
Driver Selection
Select the appropriate driver for your device from the dropdown:
- GRBL (Serial) - For GRBL devices connected via USB/serial port. Uses buffer-counting for flow control. Recommended for most GRBL devices
- GRBL (Serial Simple) - An alternative GRBL serial driver using a ping-pong protocol. Send one line, wait for "ok", send the next. Useful when the standard driver causes false alarms or communication errors on your device
- GRBL (Network) - For GRBL devices with WiFi/Ethernet connectivity
- Smoothie - For Smoothieware-based devices
Driver Settings
Depending on your selected driver, configure the connection parameters:
GRBL (Serial) - USB
- Port: Choose your device from the dropdown (e.g.,
/dev/ttyUSB0on Linux,COM3on Windows) - Baud Rate: Select
115200(standard for most GRBL devices)
If your device doesn't appear in the list, check that it's connected and that you have the necessary permissions. On Linux, you may need to add your user to the dialout group.
GRBL (Network) / Smoothie - WiFi/Ethernet
- Host: Enter the IP address of your device (e.g.,
192.168.1.100) - Port: Enter the port number (typically
23or8080)
Speeds & Acceleration
These settings are used for job time estimation and path optimization:
- Max Travel Speed: Maximum rapid movement speed
- Max Cut Speed: Maximum cutting speed
- Acceleration: Used for time estimations and overscan calculations
Step 4: Configure Hardware Settings
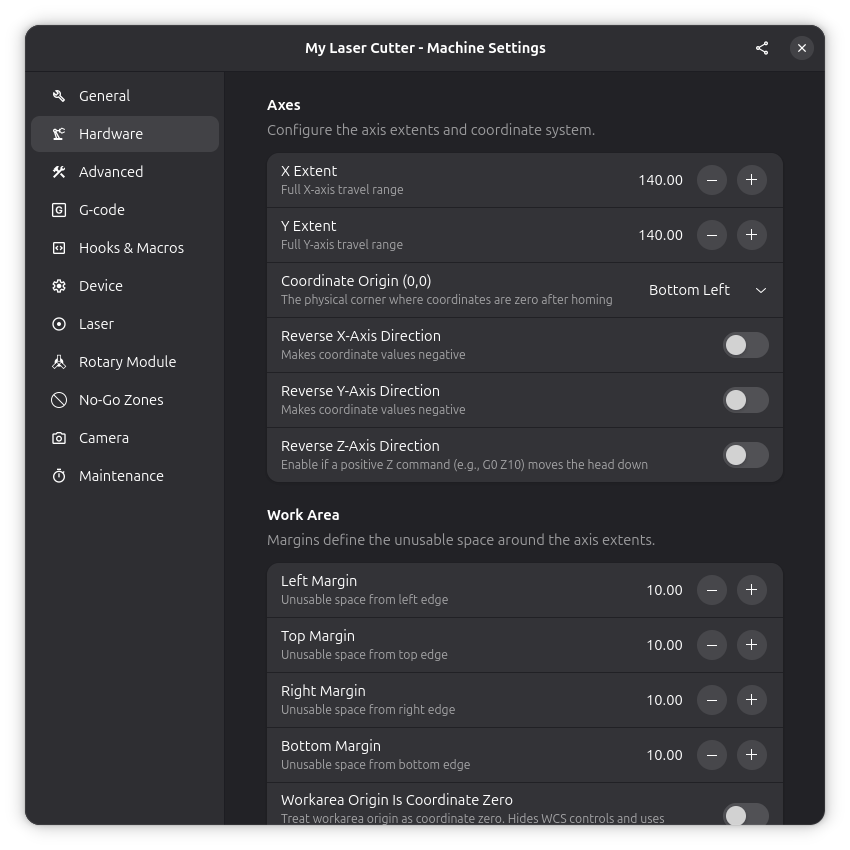
Switch to the Hardware tab to set up your machine's physical dimensions.
Dimensions
- Width: Enter the maximum width of your working area in millimeters
- Height: Enter the maximum height of your working area in millimeters
Axes
- Coordinate Origin (0,0): Select where your machine's origin is located:
- Bottom Left (most common for GRBL)
- Top Left
- Top Right
- Bottom Right
Axis Offsets (Optional)
Configure X and Y offsets if your machine requires them for precise positioning.
Step 5: Automatic Connection
Rayforge automatically connects to your machine when the application starts (if the machine is powered on and connected). You don't need to manually click a connect button.
The connection status is displayed in the bottom-left corner of the main window with a status icon and label showing the current state (Connected, Connecting, Disconnected, Error, etc.).
If your machine shows "Connected" status, you're ready to start using Rayforge!
Optional: Advanced Configuration
Multiple Lasers
If your machine has multiple laser modules (e.g., diode and CO2), you can configure them in the Laser page.
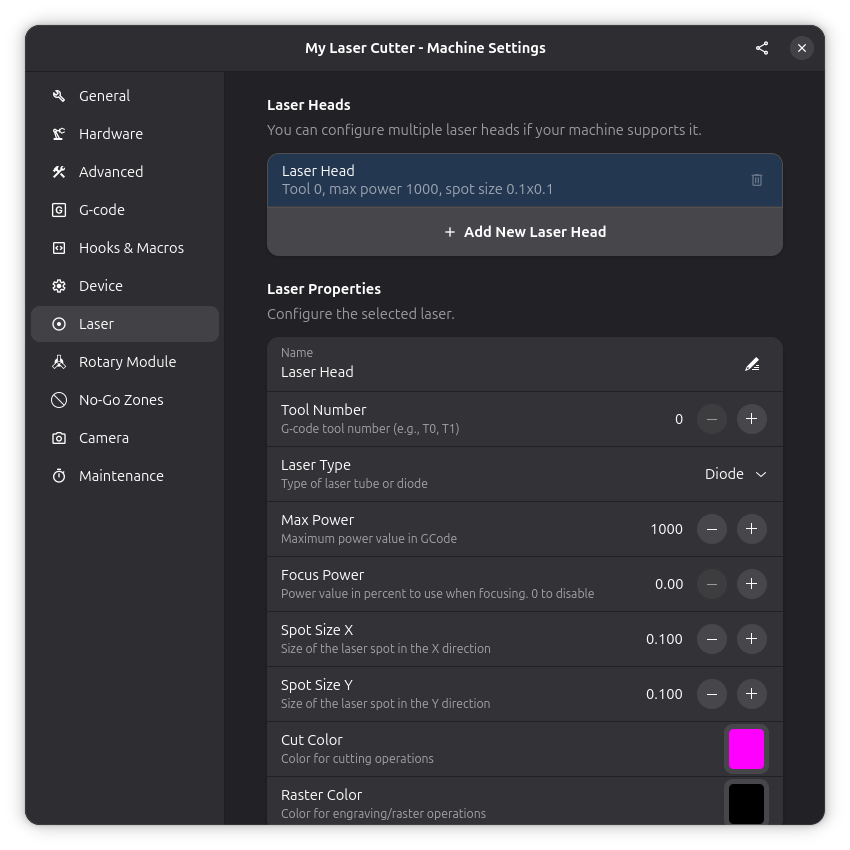
See Laser Configuration for details.
Camera Setup
If you have a USB camera for alignment and positioning, configure it in the Camera page.
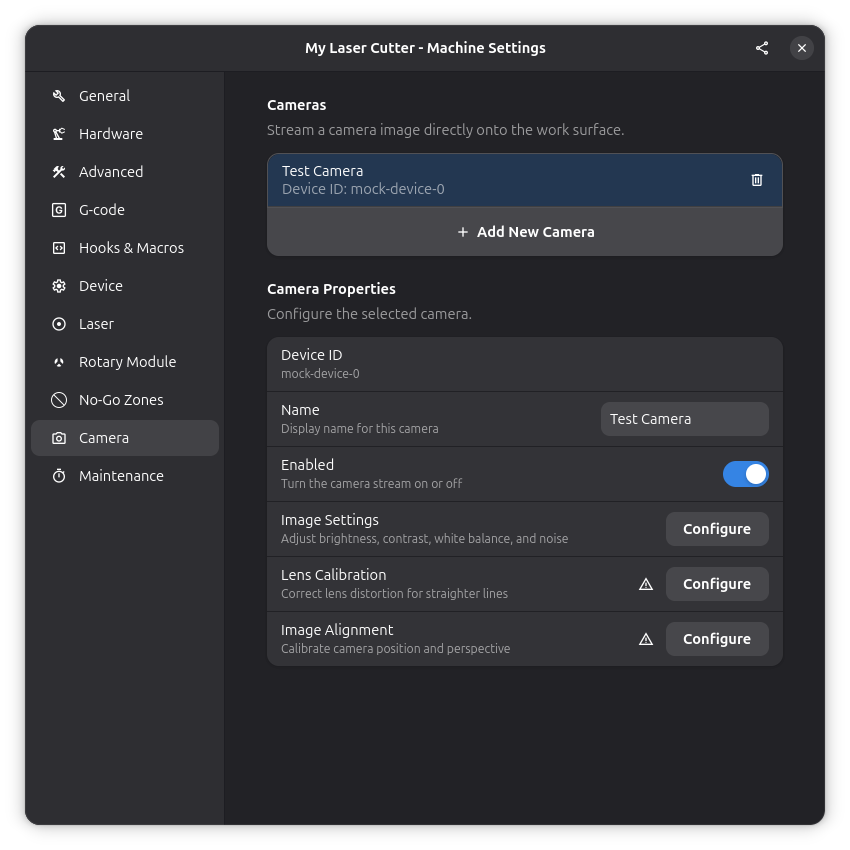
See Camera Integration for details.
Device Settings
The Device page allows you to read and modify firmware settings directly on your connected device (such as GRBL parameters). This is an advanced feature and should be used with caution.
Editing device settings can be dangerous and may render your machine inoperable if incorrect values are applied!
Troubleshooting Connection Issues
Device Not Found
-
Linux (Serial): Add your user to the
dialoutgroup. This is required for both Snap and non-Snap installations on Debian-based distributions to avoid AppArmor DENIED messages:sudo usermod -a -G dialout $USERLog out and back in for changes to take effect.
-
Snap Package: In addition to the
dialoutgroup above, ensure you've granted serial port permissions:sudo snap connect rayforge:serial-port -
Windows: Check Device Manager to confirm the device is recognized and note the COM port number.
Connection Refused
- Verify the IP address and port number are correct
- Ensure your machine is powered on and connected to the network
- Check firewall settings if using network connection
Machine Not Responding
- Try a different baud rate (some devices use
9600or57600) - Check for loose cables or poor connections
- Power cycle your laser cutter and try again
For more help, see Connection Issues.
Next: Quick Start Guide →