Quick Start Guide
Now that Rayforge is installed and your machine is configured, let's run your first laser job! This guide will walk you through importing a design, configuring operations, and sending G-code to your machine.
Step 1: Import a Design
Rayforge supports various file formats including SVG, DXF, PDF, Ruida (.rd), and raster images (JPEG, PNG, BMP).
- Click File → Open or press ctrl+o
- Navigate to your design file and select it
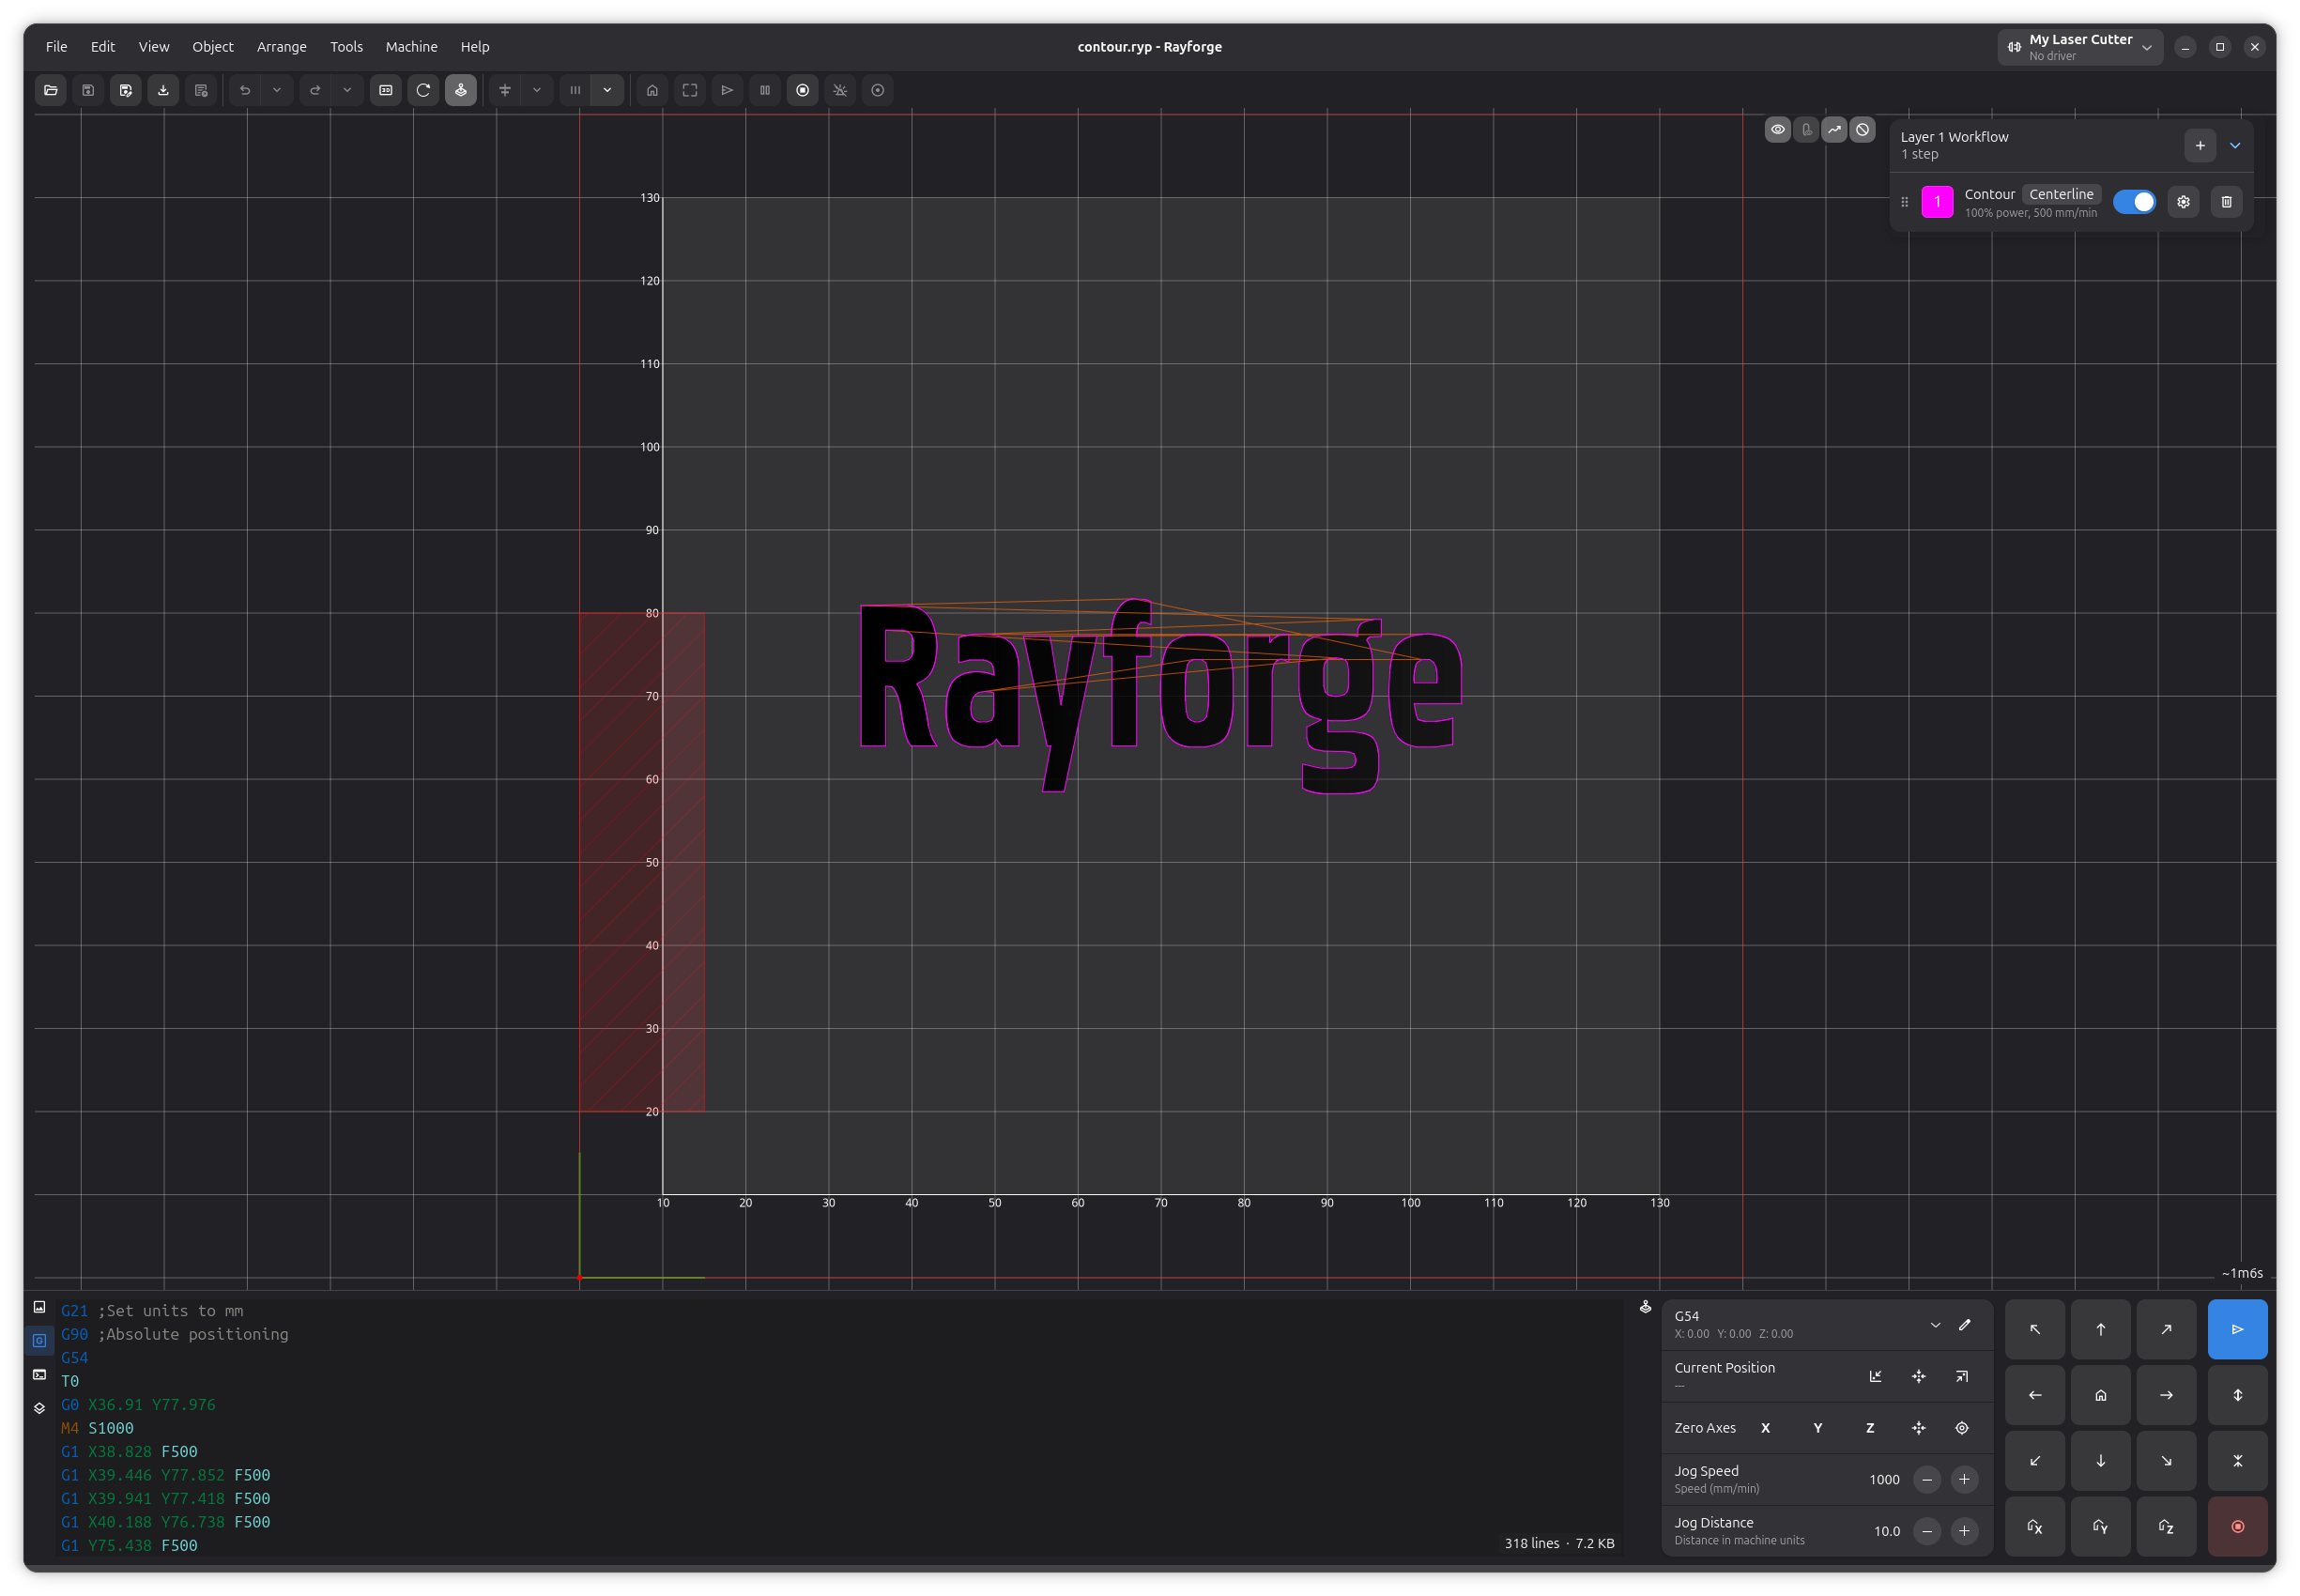
- The design will appear on the canvas
Step 2: Position Your Design
Use the canvas tools to position and adjust your design:
- Pan: Middle-click and drag, or hold space and drag
- Zoom: Scroll wheel, or ctrl+"+" / ctrl+"-"
- Move: Click and drag your design
- Rotate: Select the design and use the rotation handles
- Scale: Select the design and drag the corner handles
Step 3: Assign an Operation
Operations define how Rayforge will process your design. Common operations include:
- Contour: Cut along the outline of shapes
- Raster Engrave: Fill shapes with back-and-forth lines (for engraving)
- Depth Engrave: Create 3D depth effects from images
Adding an Operation
- Select your design on the canvas
- Click Operations → Add Operation or press ctrl+shift+a
- Choose the operation type (e.g., "Contour" for cutting)
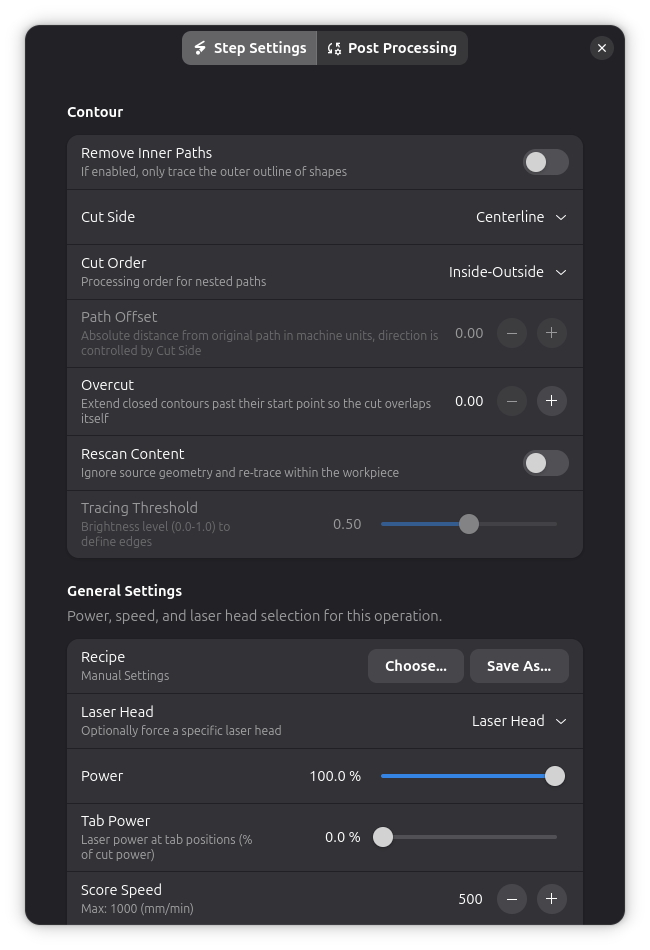
- Configure the operation settings:
- Power: Laser power percentage (start low and test!)
- Speed: Movement speed in mm/min
- Passes: Number of times to repeat the operation (useful for cutting thick materials)
When working with new materials, always start with lower power settings and run test cuts. Gradually increase power until you achieve the desired result. Use the Material Test Grid feature to systematically find optimal settings.
Step 4: Preview
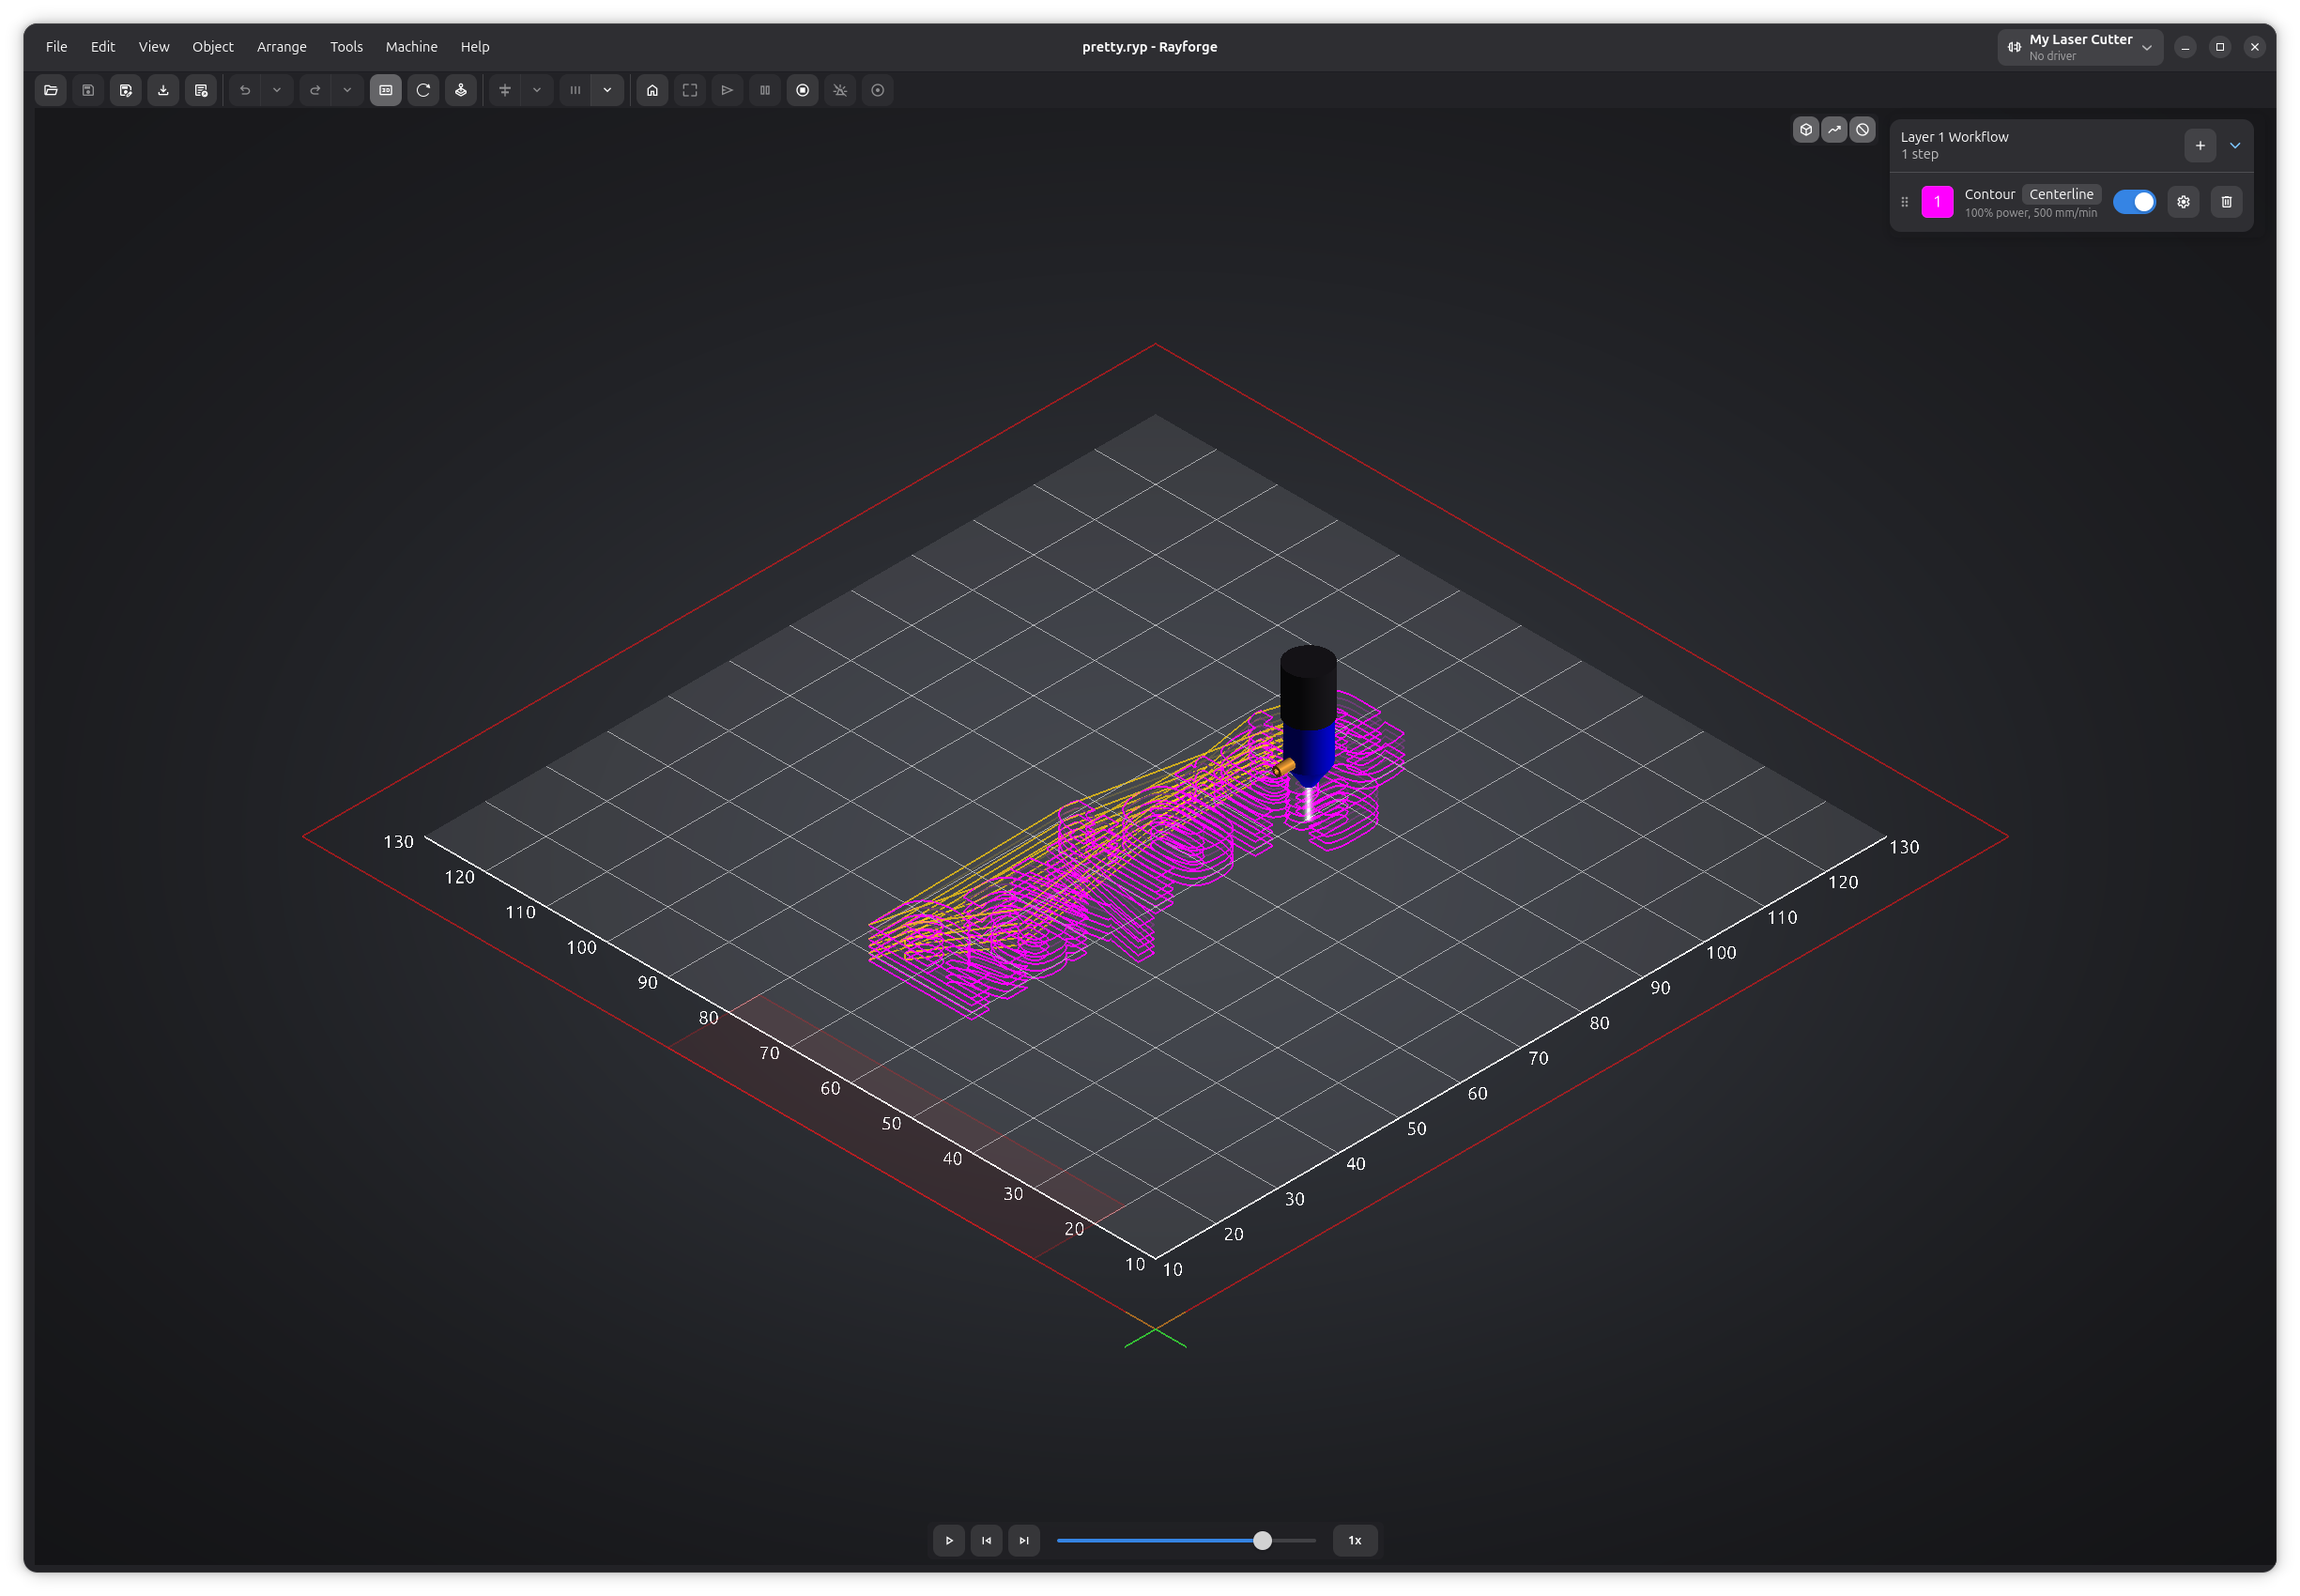
Before sending to your machine, preview the toolpath in 3D:
- Click View → 3D Preview or press F12
- The 3D preview window shows the complete toolpath
- Use your mouse to rotate and zoom the preview
- Verify that the path looks correct
The 3D preview helps you spot issues like:
- Missing paths
- Incorrect ordering
- Operations applied to the wrong objects
- Paths that exceed your working area
Step 5: Send to Machine
- Ensure the work area is clear
- Never leave the machine unattended during operation
- Have fire safety equipment nearby
- Wear appropriate eye protection
Preparing Your Material
- Place your material on the laser bed
- Focus the laser according to your machine's instructions
- Position your design using one of the methods in the Workpiece Positioning Guide
Starting the Job
-
Position the laser: Use the jog controls to move the laser to the starting position. Click View → Control Panel or press ctrl+l, then use the arrow buttons or keyboard arrows to move the laser.
-
Frame the design: Run the framing function to verify placement. Click Machine → Frame and the laser will trace the bounding box of your design at low power. Verify it fits within your material.
-
Start the job: Click Machine → Start Job
-
Monitor the progress in the status bar
During the Job
The right section of the status bar shows the current progress and total execution time estimate. Use the Pause and Stop buttons in the control panel to control the job. Note that esc exits simulation mode but does not stop an active job.
Step 6: Finishing Up
Once the job completes:
- Wait for the exhaust fan to clear any fumes
- Carefully remove your finished piece
- Clean the laser bed if necessary
You've completed your first Rayforge job! Now you can explore more advanced features.
Next Steps
Now that you've completed your first job, explore these features:
- Workpiece Positioning: Master all positioning methods (focus mode, framing, WCS, camera)
- Multi-Layer Operations: Assign different operations to layers
- Holding Tabs: Keep cut pieces in place during cutting
- Camera Integration: Use a camera for precise alignment
- Hooks & Macros: Automate repetitive tasks
Tips for Success
- Save your work: Use ctrl+s to save your project frequently
- Test cuts: Always run a test cut on scrap material first
- Material database: Keep notes on successful power/speed settings for different materials
- Maintenance: Keep your laser lens clean and check belt tension regularly
- Air assist: If your machine has air assist, use it to prevent charring and improve cut quality
Need Help? Check the Troubleshooting section or visit the GitHub Issues page.