


Offset Fill
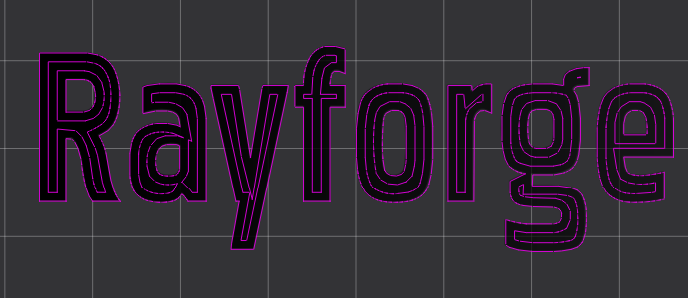
Offset Fill fills closed vector shapes with rings that run parallel to their outline. The first ring follows the outline itself; every next ring lies one line interval further inside, until the shape is filled. Holes in a shape are kept free: the rings follow their edges as well.
Overview
Where Engrave sweeps back and forth in straight lines and Wavefront expands from the center of a pocket, Offset Fill works from the outline inward. Every ring is a closed path cut along its center line, so the fill takes on the shape of the design.
Offset Fill operations:
- Fill closed vector shapes with rings parallel to the outline
- Keep holes inside a shape free
- Ignore open paths
- Cut the rings outside-in or inside-out
When to Use Offset Fill
Use Offset Fill for:
- Filling text, logos and other vector shapes with a fill that follows their contours
- Clearing pockets where the rings should hug the edge of the shape
- Designs where the fill pattern is visible in the finished piece
Don't use Offset Fill for:
- Cutting along outlines only (use Contour instead)
- Filling bitmap images (use Engrave instead)
- Open paths, which do not enclose an area to fill
Creating an Offset Fill Operation
Step 1: Prepare Your Shapes
- Import or draw closed vector shapes on the canvas
- Ensure the shapes are closed paths; open paths are skipped
Step 2: Add an Offset Fill Step
- Open the layer's workflow in the right panel.
- Click the Add Step button and choose Offset Fill.
Step 3: Configure Settings
Adjust the line interval, offset and fill direction to match your material and desired finish.
Key Settings
The step settings dialog has four tabs: Step Settings, Laser, Post Processing, and Workpieces. Settings are described in tab order below.
Offset Fill Settings
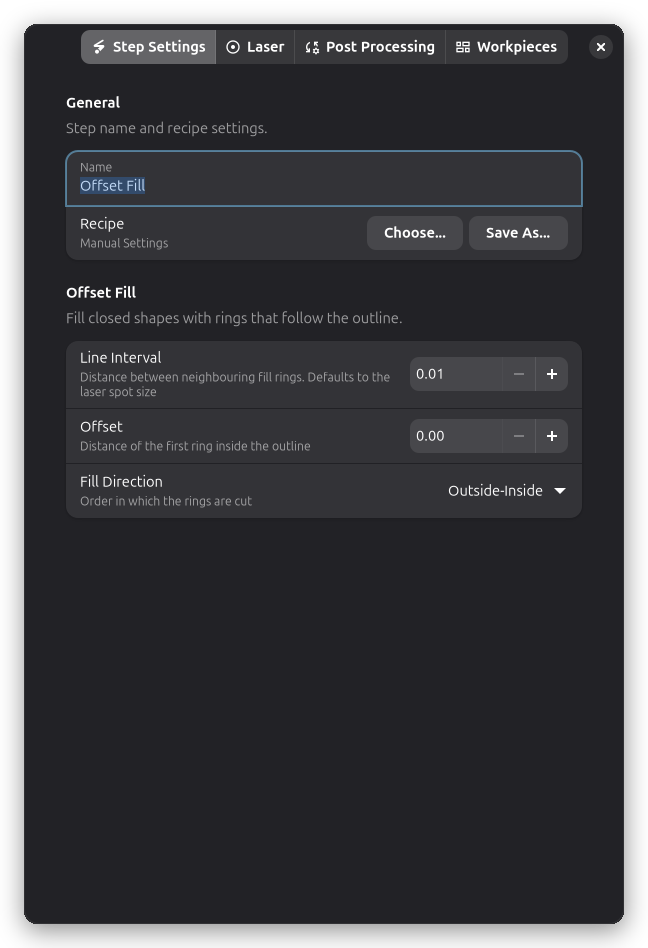
The Offset Fill group on the Step Settings tab controls the fill pattern.
Line Interval
The distance between neighbouring fill rings. Smaller values give a denser fill with more rings and longer job times; larger values are faster but leave more space between the rings.
Line Interval defaults to the laser spot size and has a range of 0.01–50.0 mm.
Offset
The distance of the first ring inside the outline. With the default of 0.0 the first ring lies on the outline; a larger value leaves a margin between the outline and the fill. This is useful when a separate Contour pass will finish the edge.
Range: 0.0–20.0 mm. Default is 0.0.
Fill Direction
The order in which the rings are cut:
- Outside-Inside (default): the outermost ring is cut first and the fill works toward the center
- Inside-Outside: the innermost ring is cut first and the outline ring is cut last
Laser settings
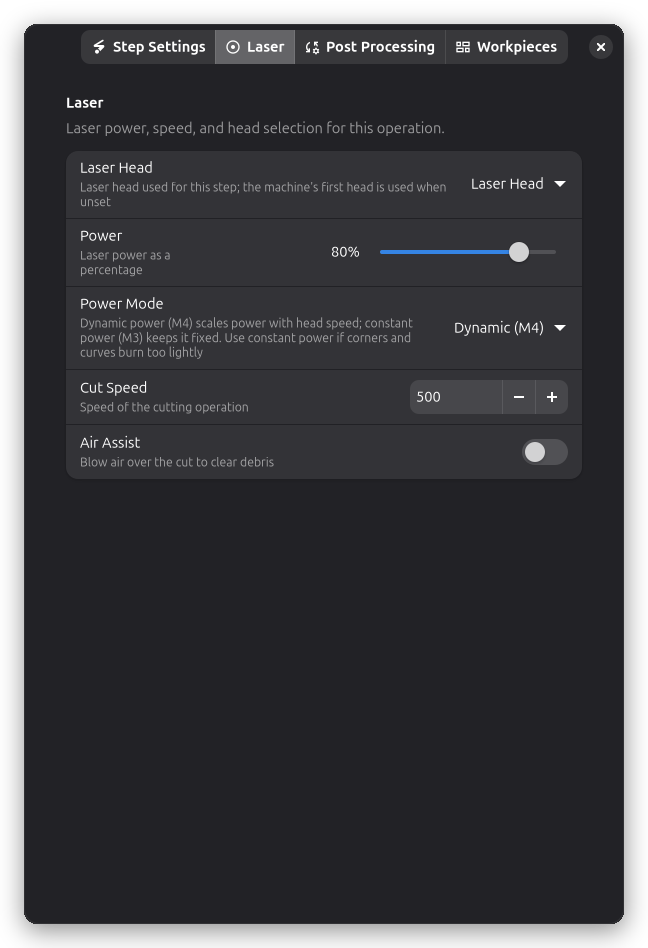
Power, speed, and laser head selection live on the Laser page of the step settings dialog. A new Offset Fill step starts at 80% power.
Power (%):
- Laser intensity for the fill
- Match your material's requirements
Speed (mm/min):
- How fast the laser moves
- Match your material's engraving speed
How Offset Fill Works
- Closed shapes — Open paths are dropped; each closed shape is handled together with its holes
- First ring — The outline, moved inward by the configured offset
- Further rings — Each next ring lies one line interval inside the previous one; rings around holes grow outward from the holes at the same time
- Completion — Rings are added until the shape is filled
- Cutting — The rings are cut along their center line in the chosen fill direction
Post-Processing
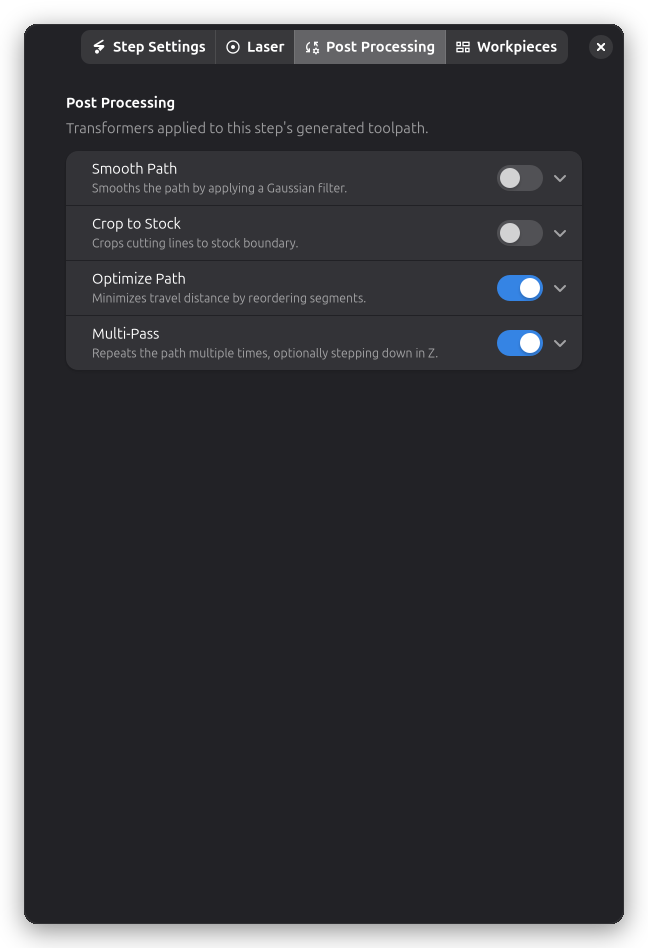
Offset Fill operations support:
- Smooth Path — Reduce jagged edges in the toolpaths (off by default)
- Crop to Stock — Limit the toolpaths to the stock boundary (off by default)
- Path Optimization — Minimize travel distance between rings
- Multi-Pass — Repeat the fill several times
Tips & Best Practices
Choosing the Line Interval
- Start from the default (the laser spot size) for a closed, even fill
- Increase the interval for a visible ring pattern or a faster job
Combining with Contour
Clear the inside of a shape with Offset Fill, then finish the edge with a Contour pass. Set the offset so the fill leaves enough room for the contour cut.
Related Topics
- Wavefront — Concentric fill expanding from the pocket center
- Contour — Cutting along vector outlines
- Engrave — Filling areas with raster engraving patterns
- Smooth Path — Refining toolpath edges