First Time Setup
After installing Rayforge, you'll need to configure your laser cutter or engraver. This guide will walk you through creating your first machine profile and establishing a connection.
Step 1: Launch Rayforge
Start Rayforge from your application menu or by running rayforge in a terminal. You should see the main interface with an empty canvas.
Step 2: Open Machine Settings
Navigate to Settings → Machine Settings or press Ctrl+, to open the machine configuration dialog.

Step 3: Create a Machine Profile
Rayforge supports multiple machine profiles, allowing you to switch between different laser cutters quickly.
General Settings
- Machine Name: Give your machine a descriptive name (e.g., "K40 Laser", "Ortur LM2")
- Working Area:
- Width: Enter the maximum width of your working area in millimeters
- Height: Enter the maximum height of your working area in millimeters
- Origin Position: Select where your machine's origin (0,0) is located:
- Bottom Left (most common for GRBL)
- Top Left
- Top Right
- Bottom Right
Laser Configuration
- Power Settings:
- Min Power: Minimum laser power percentage (typically 0-10%)
- Max Power: Maximum laser power percentage (typically 80-100%)
Power Calibration
Start with conservative power settings. You can always increase power later after testing.
- Speed Settings:
- Default Speed: Your typical engraving/cutting speed in mm/min
- Max Speed: Maximum speed your machine supports
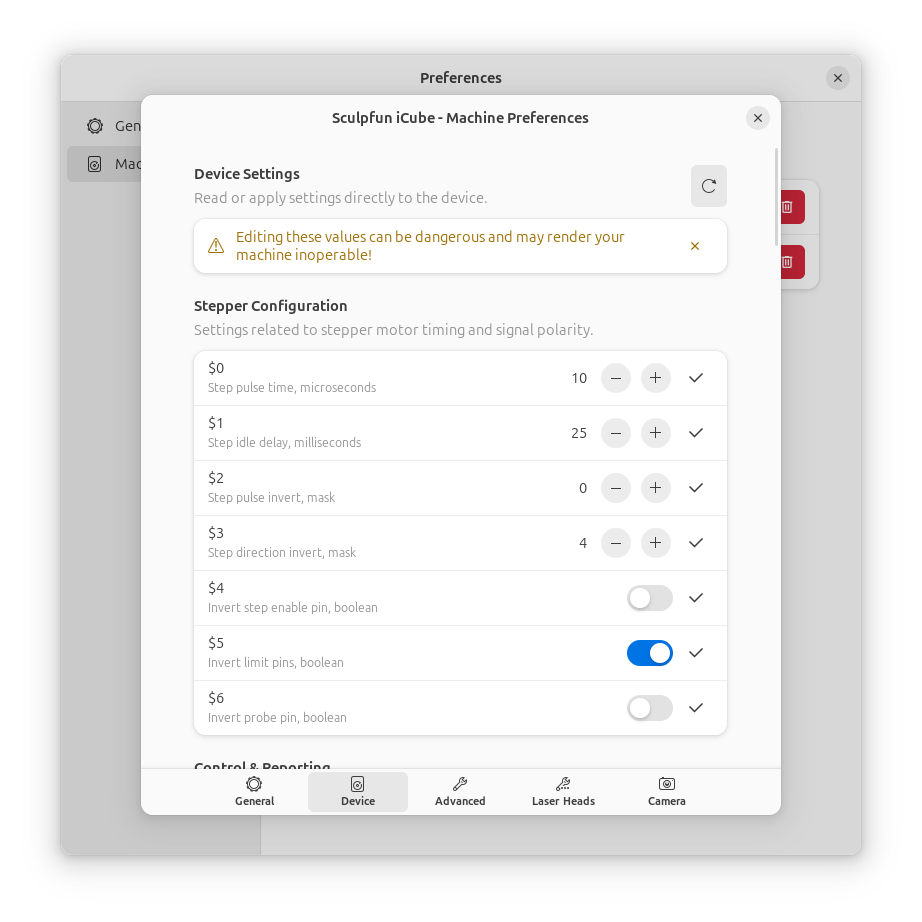
Step 4: Configure Device Connection
Switch to the Device tab to configure how Rayforge connects to your machine.
Connection Types
The most common connection type for GRBL devices.
- Connection Type: Select "Serial Port"
- Port: Choose your device from the dropdown (e.g.,
/dev/ttyUSB0on Linux,COM3on Windows) - Baud Rate: Select
115200(standard for most GRBL devices) - Flow Control: Leave as "None" unless your device requires it
Info
If your device doesn't appear in the list, check that it's connected and that you have the necessary permissions. On Linux, you may need to add your user to the dialout group.
For GRBL devices with network connectivity.
- Connection Type: Select "Network"
- Host: Enter the IP address of your device (e.g.,
192.168.1.100) - Port: Enter the port number (typically
23or8080)
For Smoothieware-based devices.
- Connection Type: Select "Telnet"
- Host: Enter the IP address of your Smoothieware device
- Port: Enter the Telnet port (typically
23)
Firmware Settings
- Firmware Type: Select your device's firmware:
- GRBL (most common)
- Smoothieware
- GRBL-compatible
Step 5: Test Connection
- Click the Connect button in the device settings or use the connect button in the main toolbar
- You should see a "Connected" status indicator
- Try sending a simple command:
- Go to Machine → Home (or press Ctrl+H)
- Your machine should perform a homing cycle
Connected!
If your machine responds correctly, you're ready to start using Rayforge!
Step 6: Save Your Profile
- Click Save or OK to save your machine profile
- Your settings will be remembered for future sessions
Optional: Advanced Configuration
Multiple Lasers
If your machine has multiple laser modules (e.g., diode and CO2), you can configure them in the Lasers tab.
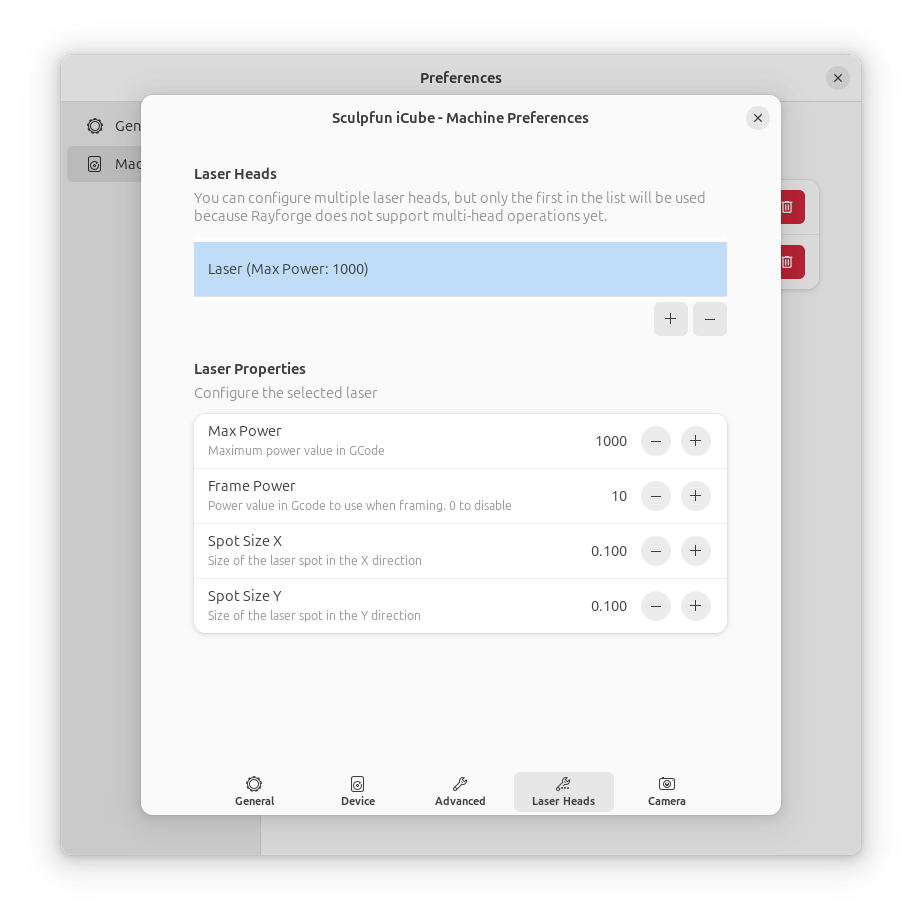
See Multiple Lasers for details.
Camera Setup
If you have a USB camera for alignment and positioning, configure it in the Camera tab.
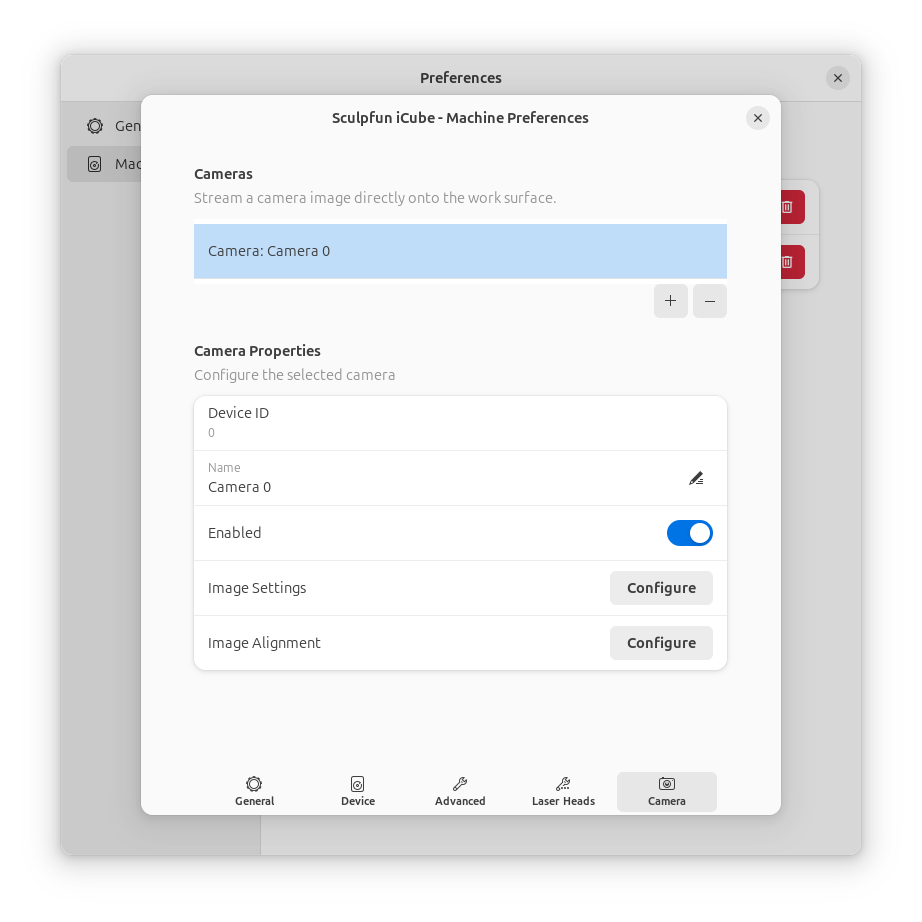
See Camera Integration for details.
Troubleshooting Connection Issues
Device Not Found
-
Linux (Serial): Add your user to the
Log out and back in for changes to take effect.dialoutgroup: -
Snap Package: Ensure you've granted serial port permissions:
-
Windows: Check Device Manager to confirm the device is recognized and note the COM port number.
Connection Refused
- Verify the IP address and port number are correct
- Ensure your machine is powered on and connected to the network
- Check firewall settings if using network connection
Machine Not Responding
- Try a different baud rate (some devices use
9600or57600) - Check for loose cables or poor connections
- Power cycle your laser cutter and try again
For more help, see Connection Issues.
Next: Quick Start Guide →